Best Router for Easy Jig Gen 2
Want to build your own AR lower receiver…without letting big brother know?
You're in luck! We hands-on review 80% Arms' Easy Jig Gen 3, using it to create a fully-functioning AR-15.
By the end of this, you'll know if an 80% project is right for you, if the Easy Jig can help you out, and some tips/tricks we learned along the way.
Need a little more than just words in an article? We got you covered with a full video explanation and review below courtesy of our very own Johnny B.
Disclaimer: We're not lawyers and you should check with your local, state, and federal laws regarding 80% receivers. Rule of thumb: if you can normally buy and own an AR-15, you can probably build one for personal use.
Note: The ATF raided Polymer80, an 80% manufacturer, in December 2020. There has been one reported case of the bureau also visiting a customer and forcing them to surrender their "P80." Pew Pew Tactical is following the situation and will provide updates if there are any legal changes in the future.
Table of Contents
Loading...
Quick Overview of 80%
Hopefully, you already know what an 80% receiver is…but here's a super fast refresher.
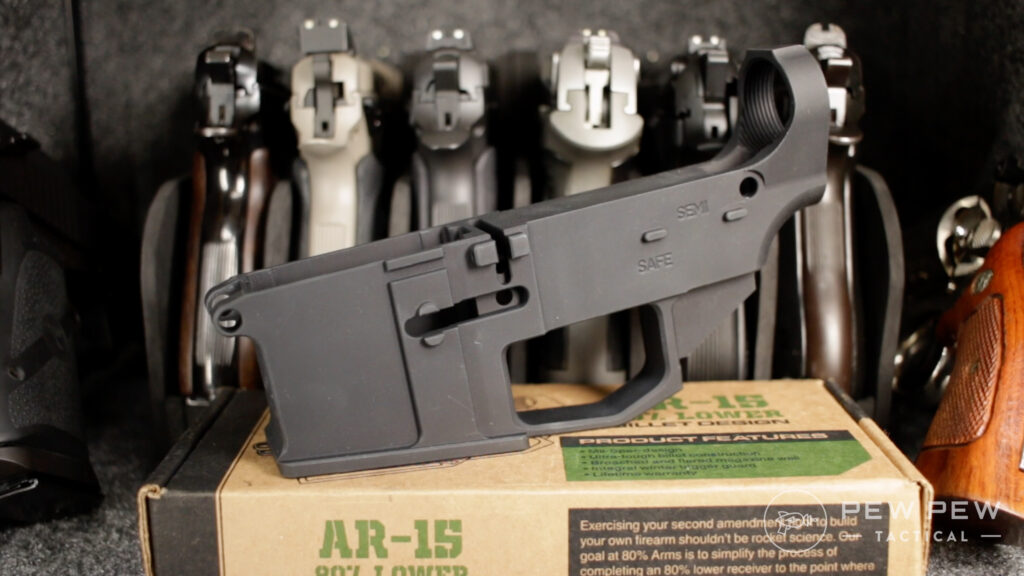
The industry term "80% receiver" refers to a hunk of metal that isn't quite ready to pair with other firearms parts. It has the basic look of a receiver but without spaces for key components like the fire control group.
Because of this, you can buy these paperweights anywhere since, at this point, they aren't functional firearms.
80% receivers can even be shipped to your house because they, again, aren't technically a gun by government standards.
119
at 80% Arms
Prices accurate at time of writing
Prices accurate at time of writing
- 25% off all OAKLEY products - OAKLEY25
BUT, there's a catch — you will need to finish them yourself.
And that's where 80% jigs come in.
Jigs help you cut out the firing control group area and some trigger pin holes so you can use the receiver and parts kit to create your very own AR-15.
All from the comfort of your home.
Old School Jigs
We cover a bunch of stuff in our Best 80% Receivers & Jigs, but many years ago you had some drill-press jigs.
First you needed a full-on drill press.
Then you had to make tons of little holes into the fire control group pocket before attempting to mill (cut in a horizontal manner) it out.
It sucked and took hours.
Easy Jig Gen 3
Now…all you need is a power drill, wood router, some bits, and the jig!
Don't worry, we'll have a list of everything at the end.
And you avoid all the dozens of little drill holes by using the router to slowly mill the pocket immediately.
So, how does it all work?
In order to transform the block of metal we call the billet into a future AR-15, we need a jig to complete the lower…enter the Gen 3.
Gen. 3 vs. Gen. 2
Now, we took the previous model from 80% Arms, the Gen 2, for a run last year. While it wasn't terrible, we wouldn't call it fantastic. At best, it was okay.
Better than older jigs but there's room for improvement.
The latest jig from 80% Arms, the Gen 3, definitely enhances the original design and offers so much more in the way of useability.
To be honest, it blows the Gen 2 out of the water.
Like its predecessor, the Gen 3 ships with directions and all the drill bits you need to mill out that lower.
Still capable of milling either an AR-15 or an AR-10, depending on your preference, the Gen 3 is surprisingly smaller and nicer looking than the previous generation.
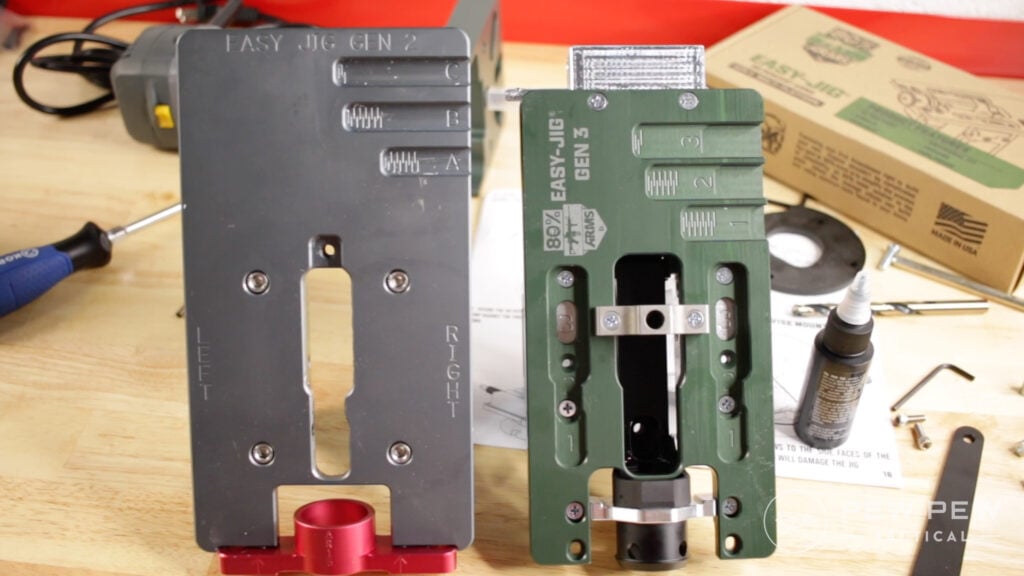
But straight up, it's simpler. We're all definitely happy about that!
The Gen 3 also benefits from channels that actually guide the router. We can't stress enough how important these channels are.
It makes things much, much easier. There's no guesswork and little frustration. Not to mention, it produces much smoother results.
If you're already rolling with the Gen 2, you can probably keep on keeping on, but if you really want the smoothest look and simplest process, then the Gen 3 is definitely worth the upgrade.
329
at 80% Arms
Prices accurate at time of writing
Prices accurate at time of writing
- 25% off all OAKLEY products - OAKLEY25
The Process
With all the parts laid out and ready to go, it was time to get started.
Plenty of you are probably like me and a little unsure about this stuff. Don't sweat it too much. With 80% Arms, you don't need a machine shop at all.
The 80% comes with clear directions that you follow step-by-step.
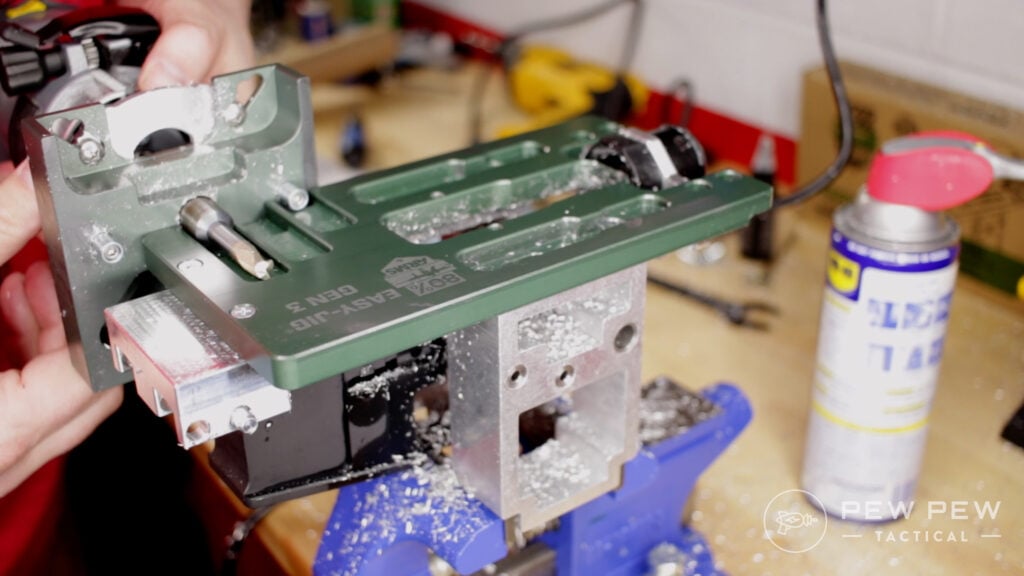
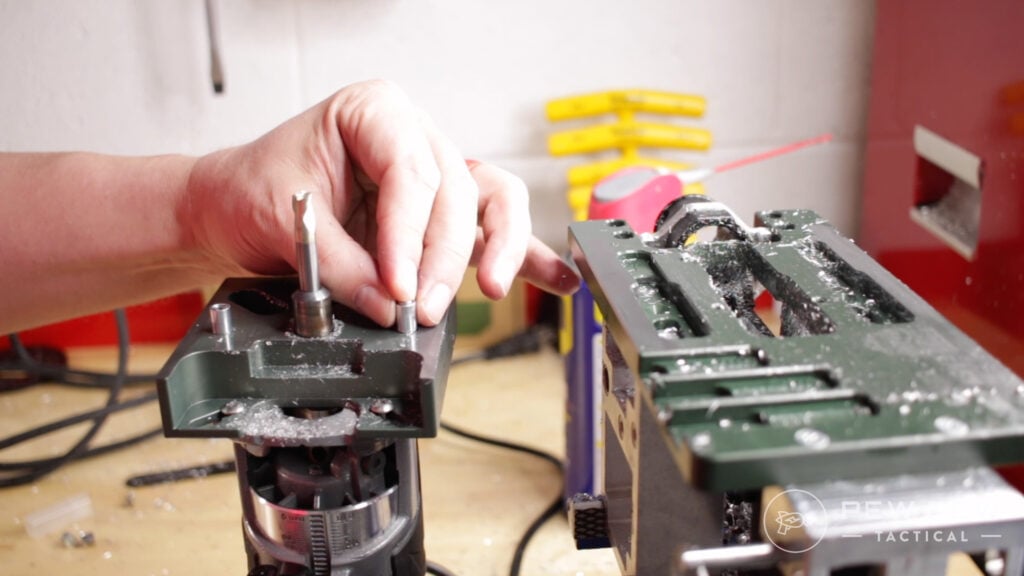
Setup the Jig
It's easy…
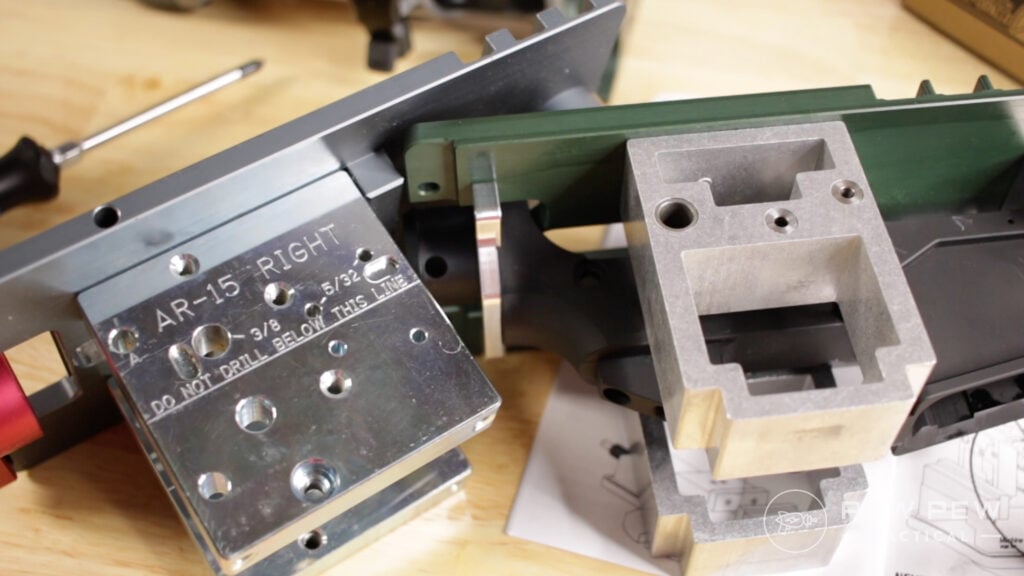
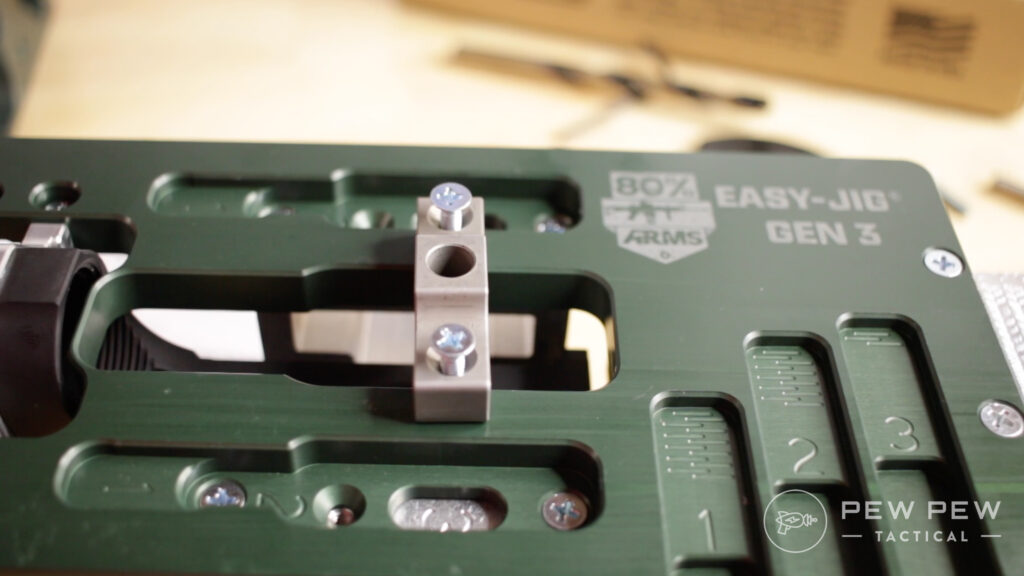
There's a big plate on top where you connect the two smaller shinier plates. One is for AR-15…
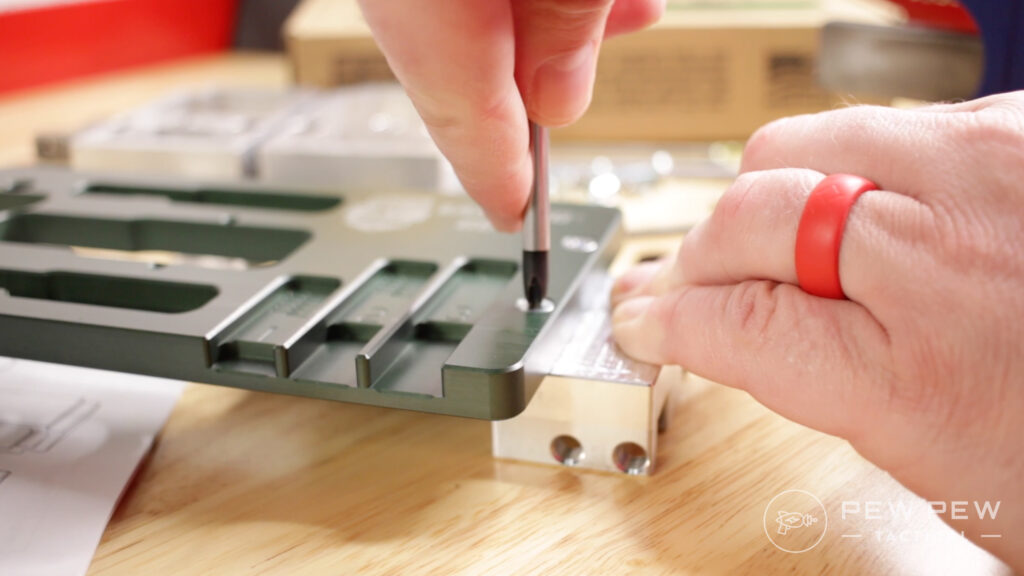
While flipping it will give you the AR-10 side plates.
Note we went with the Easy Jig Gen 3 multi-caliber version which lets you do the AR-15, AR-9, AR-45 and .308.
Connect the big plate and the sides with some pins and screws.
Then drop in your billet lower.
From there, you're ready to rock and roll on the fun part!
Pilot Hole
You're going to start by drilling a pilot hole into the receiver with a regular ole drill.
Pro tip: use a little cutting fluid and go slow.
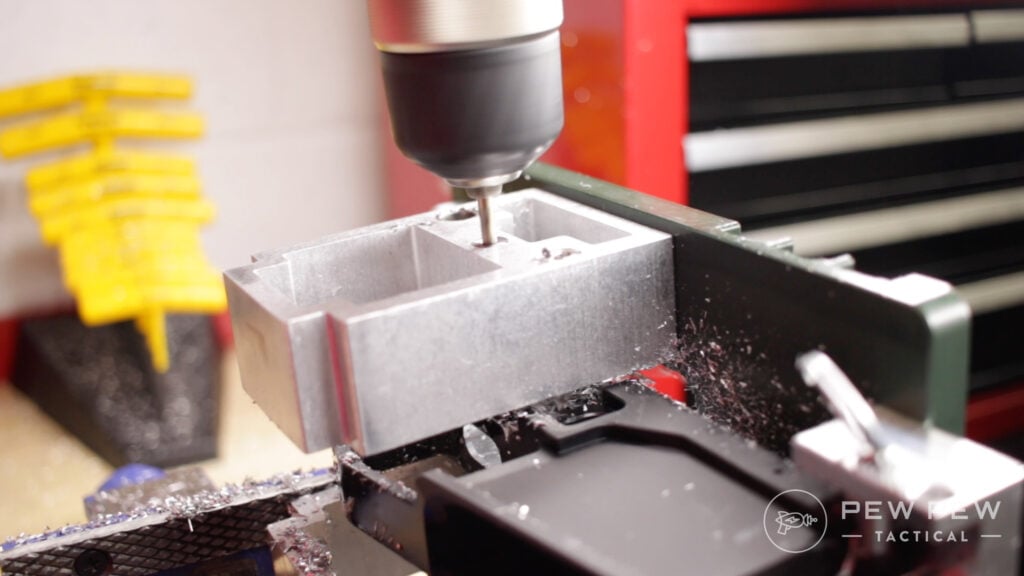
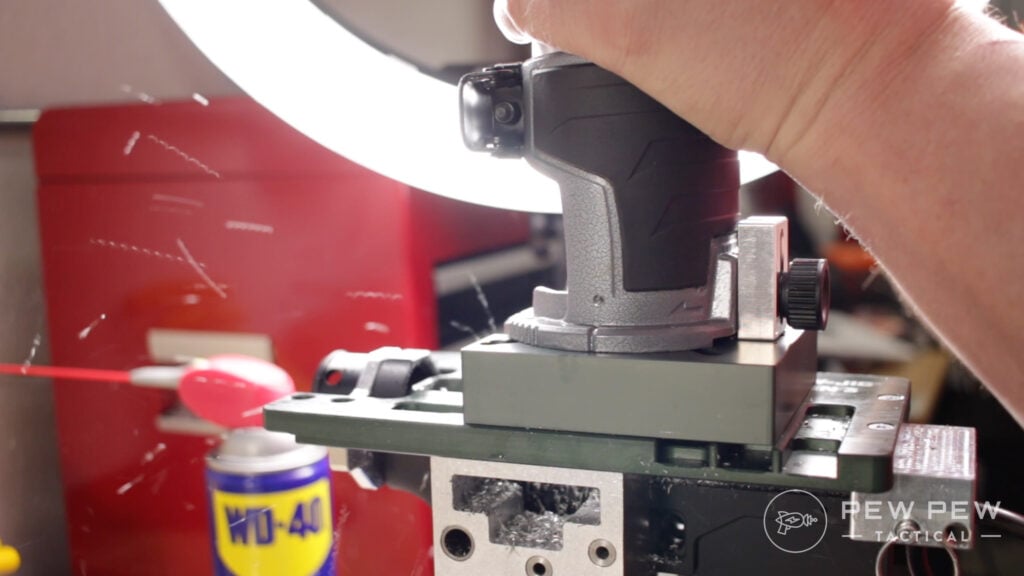
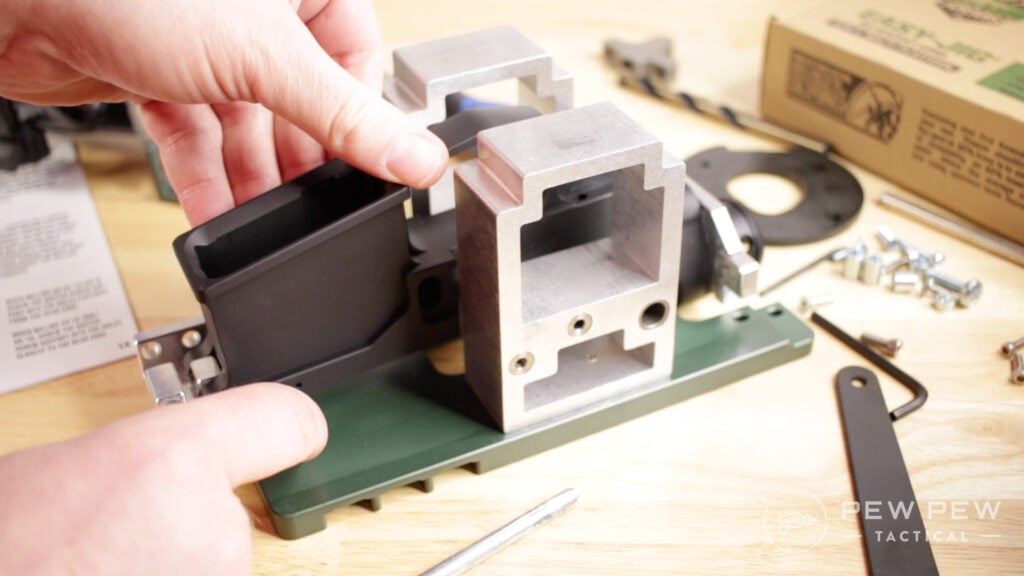
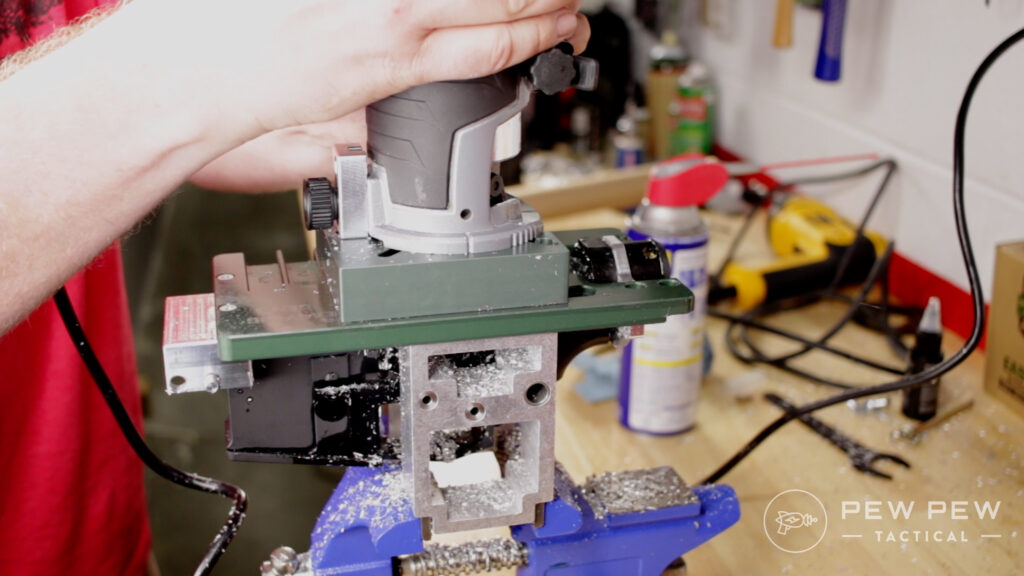
Setup the Router
Next, you're going to focus on the router. Take off the base plate and add in the 80% Arms base plate.
The two should fit right together.
Tip: Really make sure to tighten that milling bit!
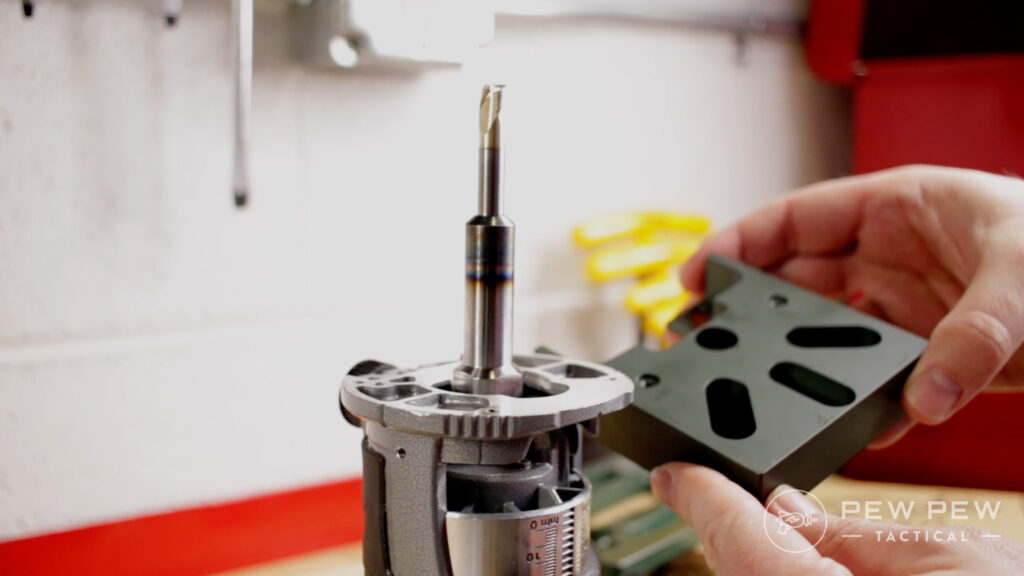
The 80% Arms base plate allows you to use the aluminum tabs that travel down in the jig channels.
They've really tried to make these idiot-proof, even going so far as offering clear guidelines that show you how deep to cut.
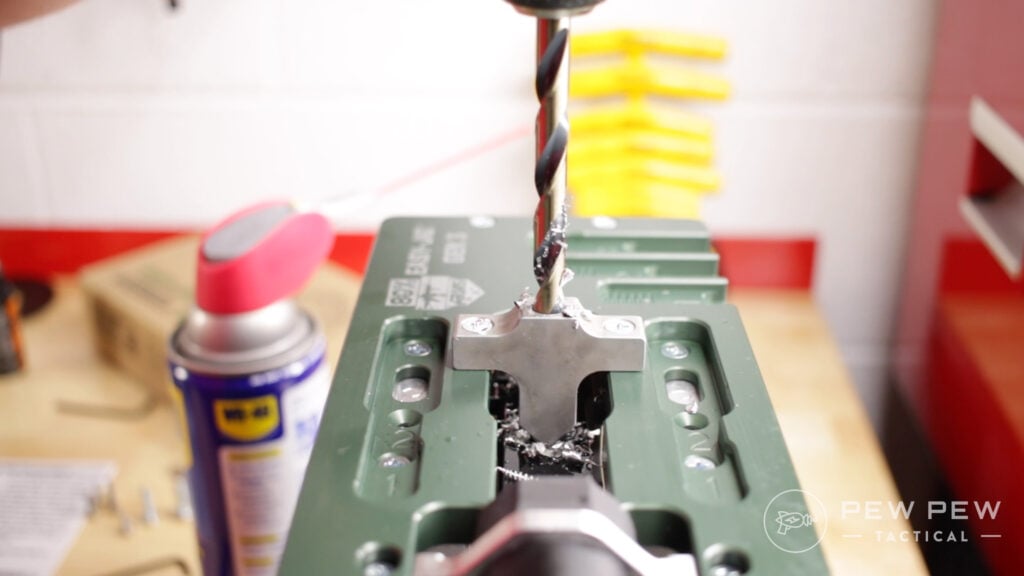
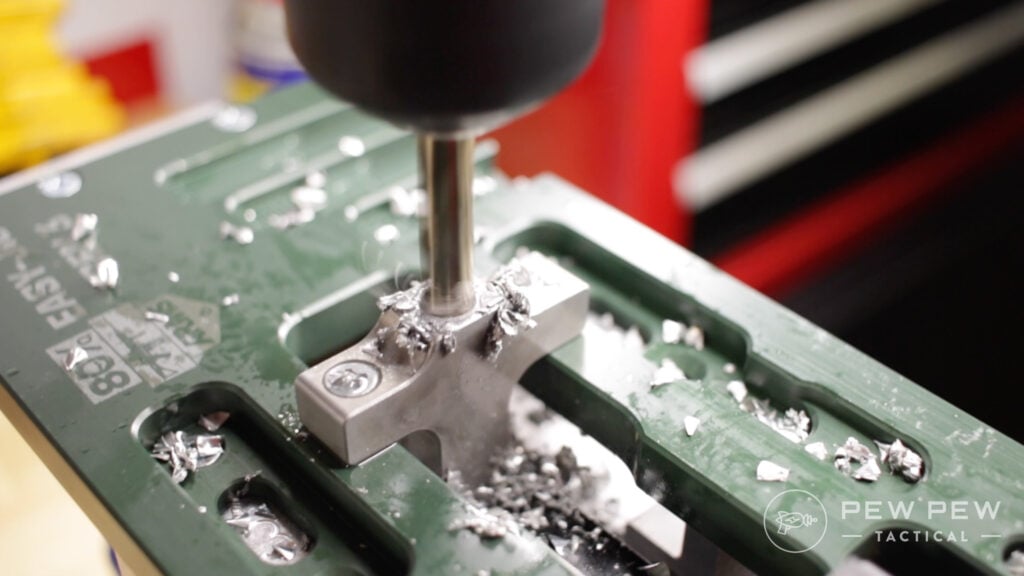
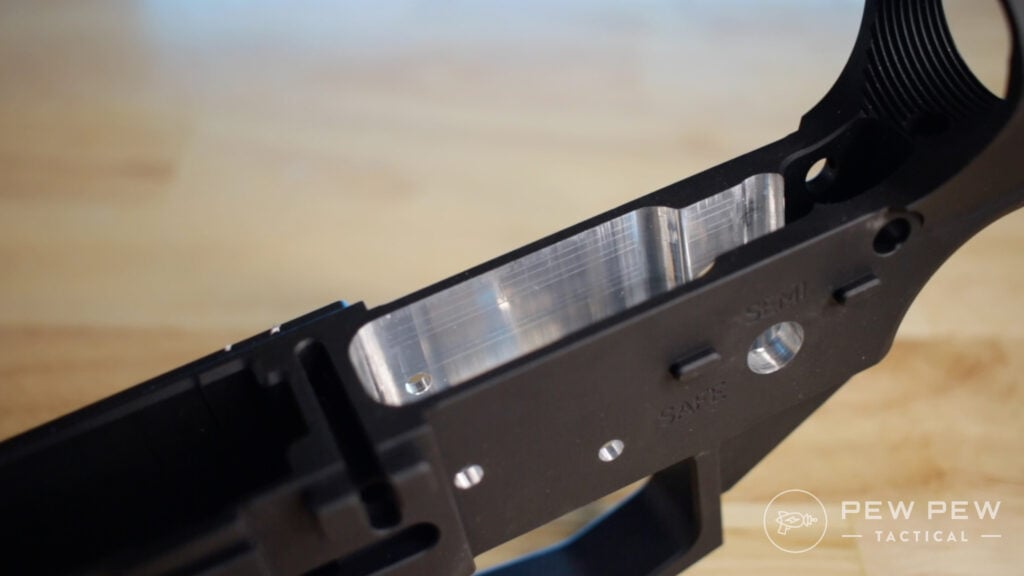
Milling
The old jigs made you measure your depth…but the top plate gives you super handy-dandy marks as measurement guides.
Buckle up, because this where the bulk of your time will be spent. You'll put on some cutting fluid (highly recommended), lower the bit to the next hashmark, start the router and put it into the pilot hole, then mill the pocket.
Another pro tip is to have your router on the highest speed and to make sure you start milling each time from the pilot hole. Both of these techniques will prevent runaway chattering (yup…learned it the hard way).
When you get to the lowest depth, you change out the aluminum tabs to the next bigger size and keep going.
There's going to be aluminum flakes everywhere…so make sure to have eye protection if not also hearing protection.
- Our Favorite Eye Pro
- Our Favorite Hearing Pro
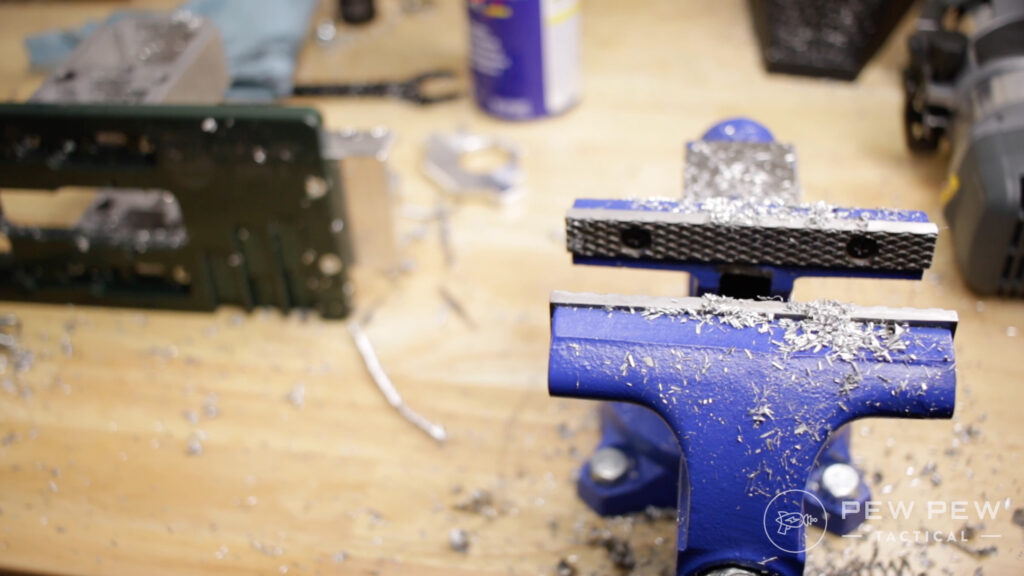
We highly recommend hooking up a Shopvac to take care of the mess.
Then boom…you're done with all the three sections of milling.
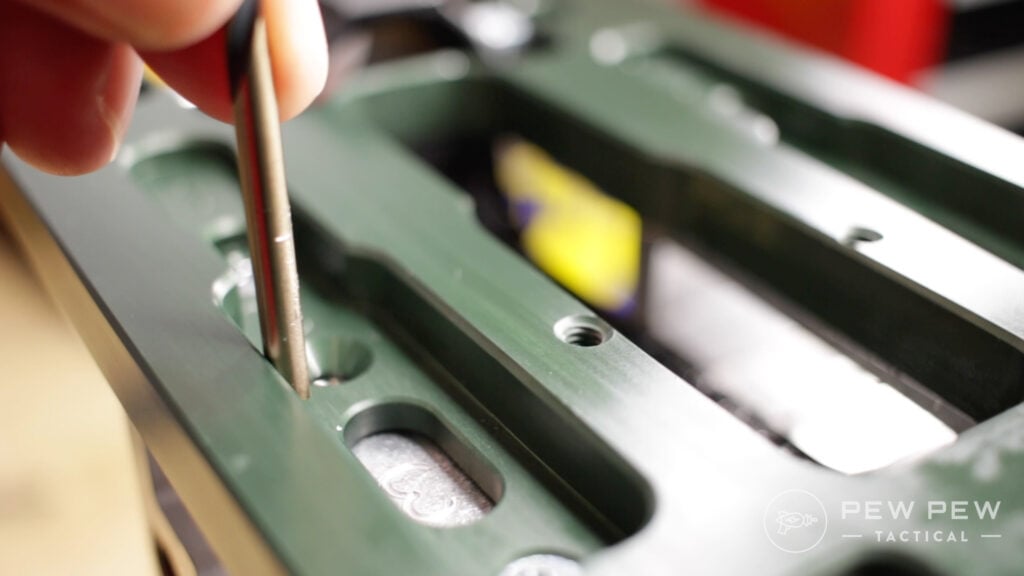
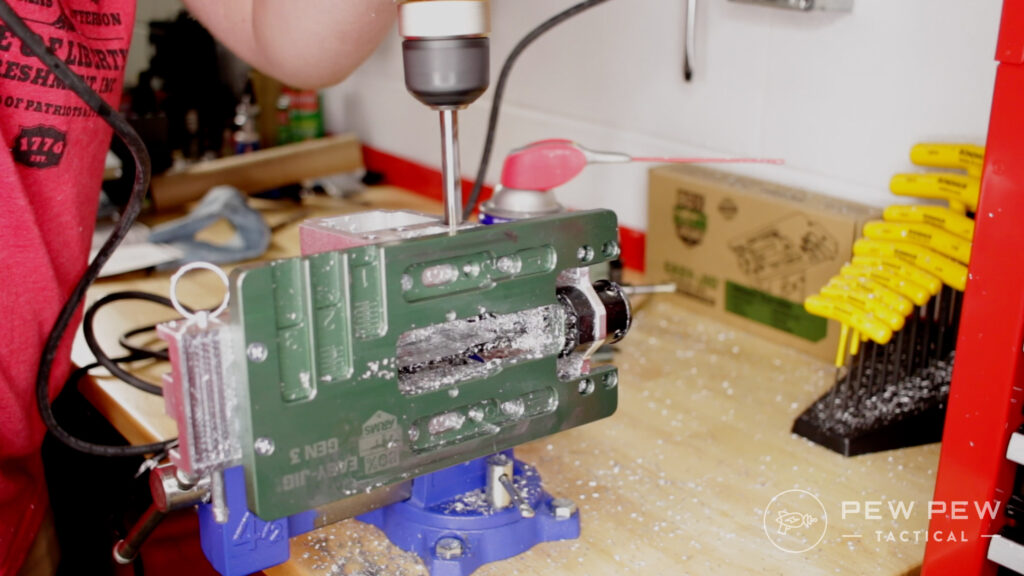
Trigger Pin and Safety Holes
Flip it to the side and get your power drill ready to make the two trigger pin holes and safety hole.
Only do one side at a time!
The nice thing about the Gen 3 is that it is very clear where these holes go.
You're basically done at this point!
Well, except for cleaning an aluminum-flake covered lower.
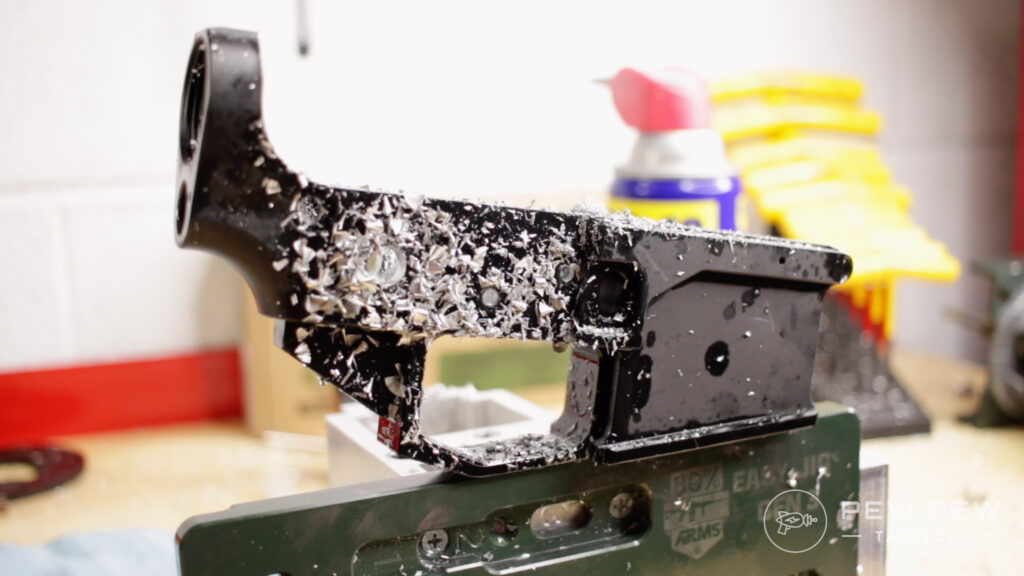
Wipe that bad boy off…
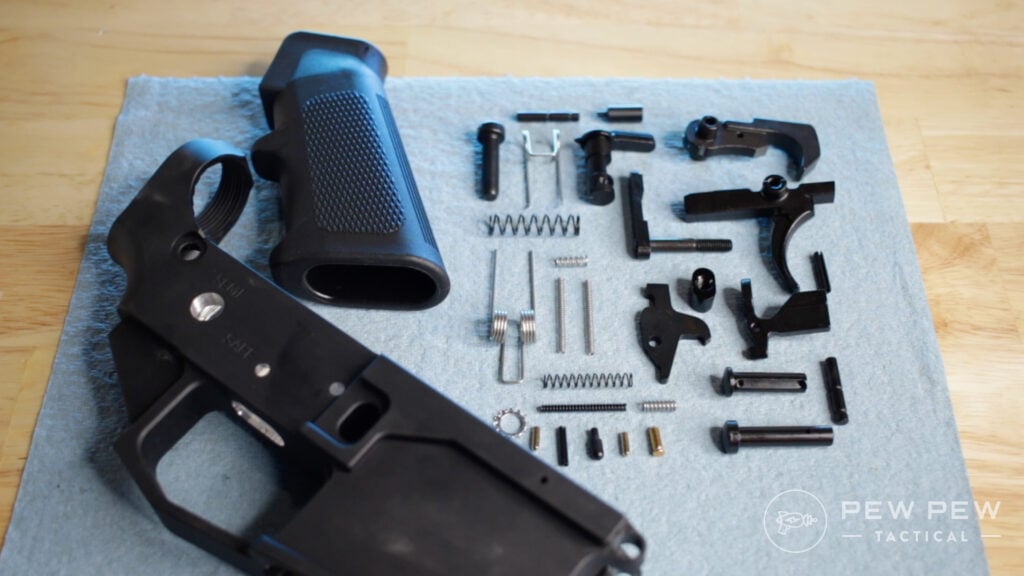
And grab your lower parts kit of choice.
Complete It
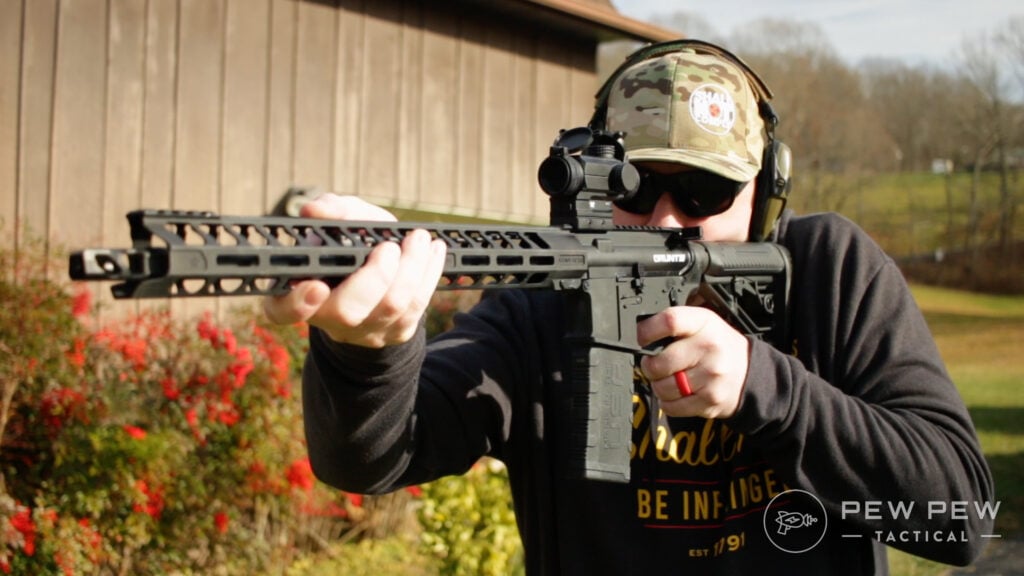
Now that the milling is done, build your AR out like you would a regular AR project.
Building this lower felt no different than any other AR lower I've worked with. And everything went together smoothly.
Check out our guide to Completing an AR-15 Lower if you need some help with that.
As always, I do a ton of function checks on everything just to make sure things are lining up and working properly.

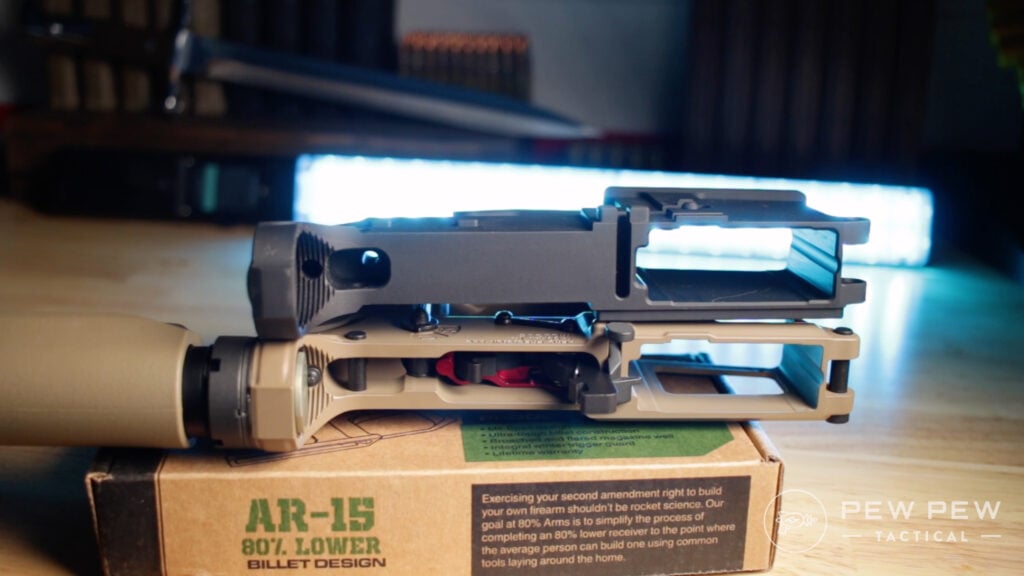
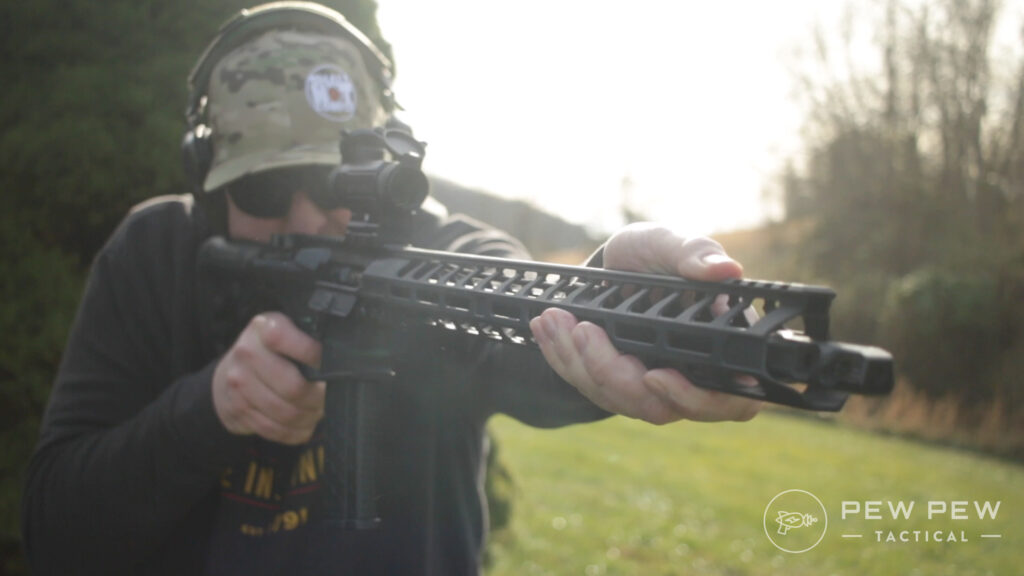
Add a nice upper (Best AR-15 Uppers) and you've got an un-serialized piece of American freedom.
Essentials
- Easy Jig Gen 3
- Drill Bit Kit: Build your own or it's easier to buy from 80% Arms since the mill bit is proprietary
- Wood Router
- Power Drill
- 80% Lowers: For this, we used 80% Arms', but here are some others we like
- Cutting Fluid: You'll probably want something…even WD-40 will do in a pinch, but here's some real aluminum cutting fluid
Nice to Have
- Shop Vac: If you don't want aluminum chips everywhere
- Vice: Makes it much easier than trying to clamp it down by hand or quick clamps
Time Needed
The amount of time you spend on this project will really come down to how comfortable and familiar you are with the process.
For those just starting out, it could take several hours as you want to be careful and deliberate.
Old pros who have done this a few times can probably knock it out in a couple of hours, though.
But trust me…this is the easiest way to go about it! The Easy Jig Gen 3 is already tons faster and more precise than the old school jigs.
Tips & Tricks
We went over several things already but here are our main takeaways…
- Read the instructions & watch the videos a couple times
- Really clamp down the mill bit onto the router or else it might back in
- Go 100% on the speed with the router
- Try half-hashmarks first. Stay with them if you have 7075 aluminum, and you can try full-hashmarks if you have the softer 6061.
- Start each milling pass in the pilot hole
- The router can overheat and shutoff…give it a few minutes
- Use cutting fluid
- Use eye and ear protection!
Is It Worth It?
It does add up with the jig (even if you go with the cheaper ones), bits, lowers, and tools if you don't have them.
Building 80%-ers is usually never about cost savings.
It's about exercising your right to make your own guns away from the eyes of Uncle Sam.
Plus…it's super cool to know you built your own lower receiver.
All that sounds good…but it's still a good chunk of change.
I'd recommend either building a lot of them (for your own personal use). Or going in with a couple of friends.
Conclusion
There you have it…our review of the 80% Arms Easy Jig Gen 3.
If you're decently handy and want an AR that you literally built yourself (without those pesky serials)…it could be the easiest way.
329
at 80% Arms
Prices accurate at time of writing
Prices accurate at time of writing
- 25% off all OAKLEY products - OAKLEY25
Again, take a look at our full video review from Johnny B. to see the process from beginning to end.
Are you going to attempt an 80% project now? Check out our Best 80% Receivers article as well as our Definitive AR Guide to get all the best parts for your future build.
Source: https://www.pewpewtactical.com/80-percent-arms-easy-jig-review/
0 Response to "Best Router for Easy Jig Gen 2"
Post a Comment